How to set up Outlook to send and receive with a MailWish business email account.
We don’t recommend setting up Outlook. Instead, we recommend using our built-in webmail(Mailbux – https://mailbux.com) to unlock all the features, such as Files, Docs, and more apps. However, if you still want to achieve this, you can follow the guide below:
- To synchronize your emails with IMAP or POP3 you need to activate this feature in your mailwish.net business email account. Click Email → Settings → POP3 & IMAP → Enable access to this account via POP3 and IMAP. Confirm the altered settings by clicking Save and start your external email program.
- Click File → Info → Add account.
The Outlook wizard for setting up a new account will open.
- Enter an email address to add your account.
- Click Advanced options and check the box for Let me set up my account manually.
- Click Connect.
- Choose the account type IMAP.
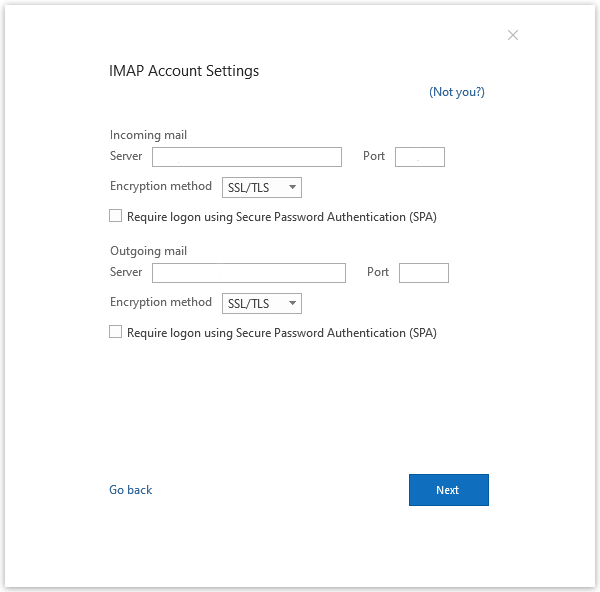
The dialog IMAP Account Settings will open up.
- Use the following settings:
- Incoming mail: Server mail.mailwish.net with port 993 and check the option This server requires an encrypted connection (SSL/TLS)
- Outgoing mail: Server mail.mailwish.net with port 587 and the encryption method STARTTLS


